
Blog
DIY Asphalt Repair: A Step-by-Step Guide to Fixing Your Driveway
If you’ve noticed cracks, potholes, or uneven surfaces in your asphalt driveway, you're likely considering repair options. While hiring a professional is always an option, many homeowners are turning to do-it-yourself asphalt repair to save money and handle the project on their own schedule. Whether you have a few small cracks or need to fill a larger pothole, this guide will walk you through the steps of DIY asphalt repair.
In this blog, we’ll cover everything from identifying the type of damage your asphalt driveway has to the tools and materials you’ll need for a successful repair. By the end, you'll know how to tackle those driveway imperfections and make your asphalt surface look brand new again.
Why DIY Asphalt Repair?
Many homeowners may wonder if they should attempt an asphalt repair project on their own or call in a professional. Here are some reasons why DIY driveway repair might be the right choice for you:
- Cost Savings
Professional asphalt repair can be expensive, especially for minor cracks or potholes. Doing the repairs yourself can save you hundreds of dollars in labor costs while only requiring the purchase of basic materials and tools.
- Convenience
With DIY repairs, you can tackle the project on your schedule, rather than waiting for a contractor’s availability. This allows you to address damage quickly, preventing it from worsening.
- Satisfaction
There’s a sense of accomplishment that comes from successfully completing a home improvement project. Repairing your own driveway allows you to take control of your property’s maintenance and aesthetics.
Types of Asphalt Damage: Know What You’re Dealing With
Before jumping into repairs, it’s important to identify the type of damage your asphalt driveway has. Not all cracks and potholes are created equal, and understanding the severity of the damage will help you determine the best course of action.
- Hairline Cracks
These small cracks are often caused by surface wear or slight shifting of the asphalt. They’re typically less than 1/8 inch wide and can be easily repaired with a liquid crack filler.
- Alligator Cracking
Alligator cracks are characterized by a series of interconnected cracks that resemble the scales of an alligator. This type of damage is usually a sign of more serious underlying issues, such as an inadequate base or heavy vehicle traffic. While surface repairs can address the immediate problem, you may need to investigate the cause to prevent recurrence.
- Potholes
Potholes occur when water penetrates cracks in the asphalt, weakening the base material and causing sections of asphalt to collapse. Potholes can range in size and severity, but they require immediate attention to prevent further damage.
- Edge Cracks
These cracks occur along the edges of the driveway and are typically caused by poor drainage or inadequate support. Edge cracks can allow water to infiltrate, leading to further damage over time.
Tools and Materials You’ll Need for DIY Asphalt Repair
Once you’ve assessed the damage, it’s time to gather your tools and materials. Here’s a list of essentials you’ll need for most DIY asphalt repair projects:
- Asphalt crack filler: For filling small cracks. Available in liquid or caulking-style tubes.
- Cold patch asphalt mix: Used for larger cracks or potholes. It’s a ready-to-use material that doesn’t require heating.
- Crack cleaning tool: To remove debris from cracks.
- Trowel or putty knife: For smoothing the filler material.
- Tamper or hand compactor: To compress the asphalt patch for a level finish.
- Sealant: To protect the repaired area and prevent future cracks.
- Pressure washer: Optional, for thoroughly cleaning the asphalt before starting repairs.
- Broom or leaf blower: To clear dirt and debris from the driveway.
Step-by-Step Guide: How to Repair Your Asphalt Driveway
Now that you have your materials ready, let’s dive into the step-by-step process of driveway repair. Whether you’re filling small cracks or repairing a pothole, this guide will help you restore your asphalt surface.
Step 1: Clean the Area
Before you can apply any filler or patch, it’s crucial to thoroughly clean the damaged area. Dirt, debris, and loose asphalt can prevent the filler from adhering properly, leading to premature failure.
- For cracks: Use a crack cleaning tool or a screwdriver to clear out any debris lodged in the crack. A broom or leaf blower will help remove any loose material.
- For potholes: Use a pressure washer to clean out dirt, rocks, and debris. This will ensure the patching material bonds well to the base.
Expert Insight: "Proper cleaning is half the battle in asphalt repair," says Mike Pearson, an experienced asphalt contractor. "If you don’t clean the area properly, your repair won’t last."
Step 2: Prepare the Cracks
For small cracks, you’ll want to apply a liquid crack filler. If you’re dealing with wider or deeper cracks, use a rubberized asphalt filler. This material will expand and contract with temperature changes, helping prevent future cracks.
- For hairline cracks: Simply squeeze the liquid crack filler into the crack, filling it completely.
- For larger cracks: Apply the rubberized filler with a caulking gun and use a trowel to smooth the surface.
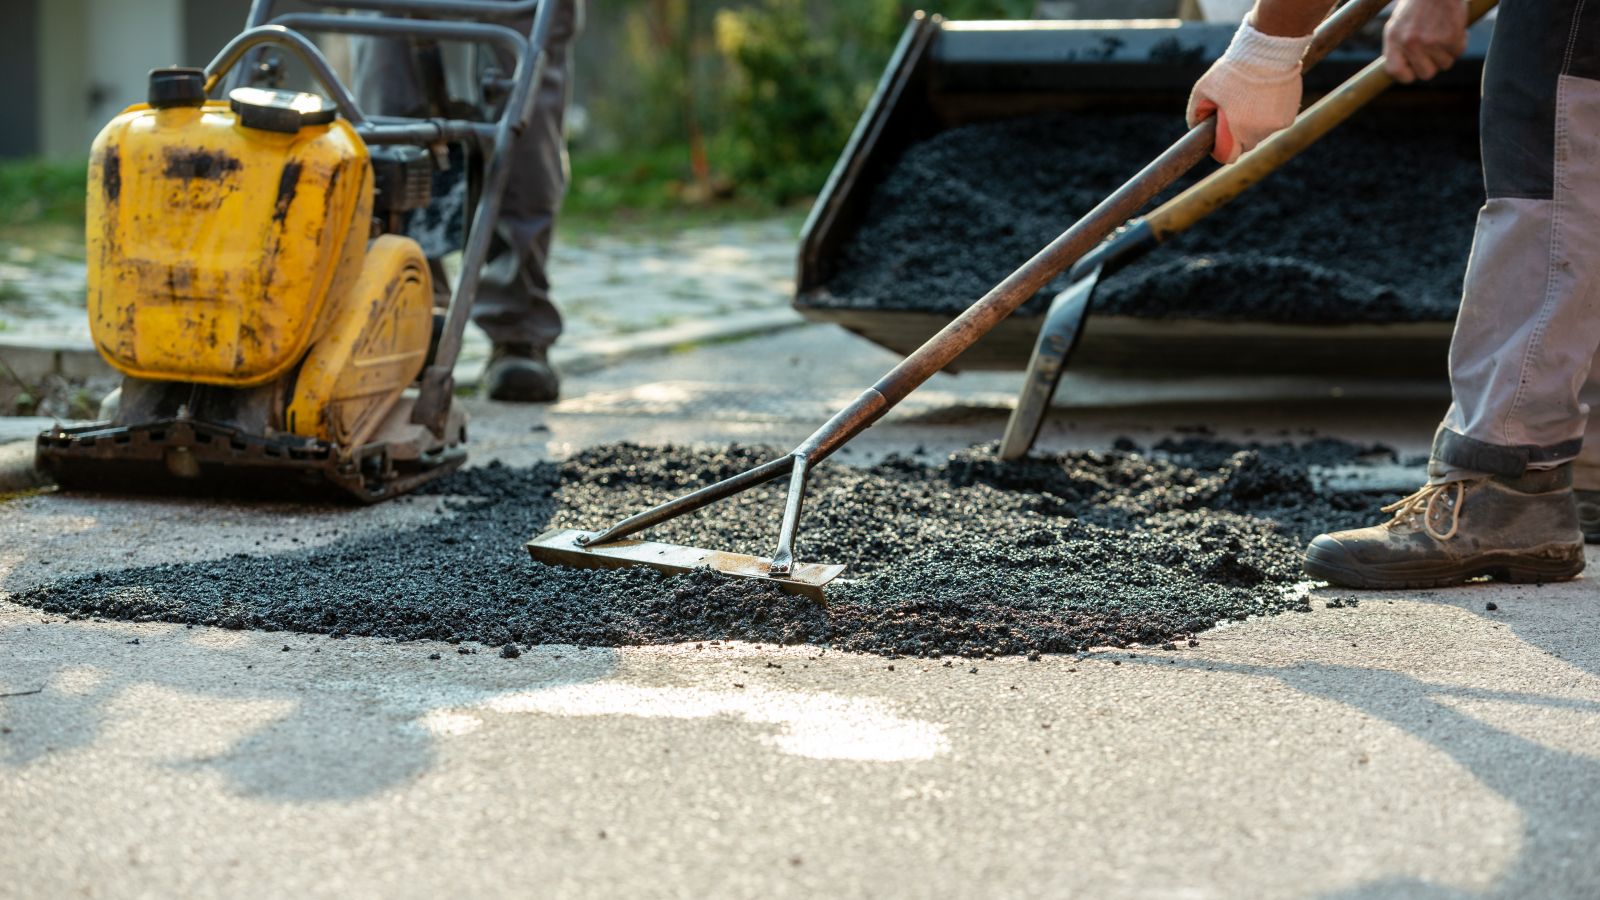
Step 3: Patching Potholes
Potholes require a bit more work than cracks, but with the right approach, you can handle them with ease. Once the area is clean and dry, follow these steps:
- Fill the hole: Use a cold patch asphalt mix to fill the pothole. Pour enough material so it stands slightly above the surrounding surface.
- Compact the material: Use a hand tamper or compactor to compress the patch, ensuring that it’s level with the surrounding asphalt.
- Add additional layers: If necessary, add more patch material and continue tamping until the hole is filled completely and flush with the rest of the driveway.
Step 4: Seal the Repaired Area
Once you’ve filled the cracks or potholes, it’s important to seal the area to protect it from water infiltration and UV damage. Asphalt sealant creates a protective layer that helps prevent future cracks and fading.
- Apply the sealant evenly across the repaired areas using a squeegee or roller.
- Let the sealant cure according to the manufacturer’s instructions, usually 24 to 48 hours.
Real-Life Example: Sarah, a homeowner in Georgia, repaired her driveway using this method. "I was intimidated at first, but after filling a few cracks and sealing the driveway, it looked amazing. It took me a weekend, but I saved so much money doing it myself."
Tips for Long-Lasting Asphalt Repair
Asphalt repair is only effective if done correctly. Here are some additional tips to ensure your DIY project is successful and long-lasting:
- Don’t Rush the Job
Take your time with each step, especially when cleaning the damaged area. Rushing through the cleaning or repair process can result in poor adhesion, causing the repair to fail.
- Weather Matters
Choose a warm, dry day to repair your driveway. Cold weather can make the asphalt material more difficult to work with, while wet conditions can prevent the filler from setting correctly.
- Compact Thoroughly
Proper compaction is key to ensuring your patch stays intact. Whether using a hand tamper or a powered compactor, make sure you compact the patch thoroughly to avoid future sinking or cracking.
- Regular Maintenance
After repairing your asphalt driveway, make it a habit to regularly inspect and seal your driveway every 2 to 3 years. This will help prevent cracks from forming in the future and keep your driveway looking fresh.
When to Call a Professional
While DIY asphalt repair can be a rewarding project, there are certain situations where calling in a professional might be the better option. If your driveway has extensive damage, severe alligator cracking, or requires full resurfacing, a contractor with specialized equipment may be necessary.
Signs You Need a Professional:
- Large sections of the driveway are crumbling or have deep cracks.
- The sub-base of your driveway is compromised, leading to sinking or uneven areas.
- The surface is riddled with potholes, suggesting significant structural issues.
Expert Opinion: "For small jobs, DIY repairs work great. But for extensive damage, you might need to bring in a professional to avoid recurring issues," advises Laura Simmons, an asphalt paving contractor.
Conclusion: Take Charge of Your Asphalt Repairs
With the right tools and techniques, DIY asphalt repair can be a cost-effective and manageable project for any homeowner. From filling cracks to patching potholes, these simple steps will help you extend the life of your driveway and keep it looking great.
Whether you're repairing a small crack or tackling a larger pothole, this guide provides you with all the information you need to confidently take on your asphalt repair project. Remember, regular maintenance and sealing will go a long way in preserving the quality of your driveway for years to come.
So, the next time you notice cracks or damage on your driveway, grab your tools and materials and take control of the repair!
Blog Categories

Address
605 Hampton Park
Capitol Heights, MD 01234

Phone